
Color space has really been a big deal to me lately especially now that I have been working on compositing CG components into my film. Getting elements to match has been quite a thorough process that has led me to discover many new things.
One of these things is the necessity of converting image texture color spaces to ACES.
The Solution
In order to move forward, we first need to make sure we have ACES available inside of Houdini. If you haven’t already integrated OCIO color / ACES with Houdini, I have a tutorial for you here.
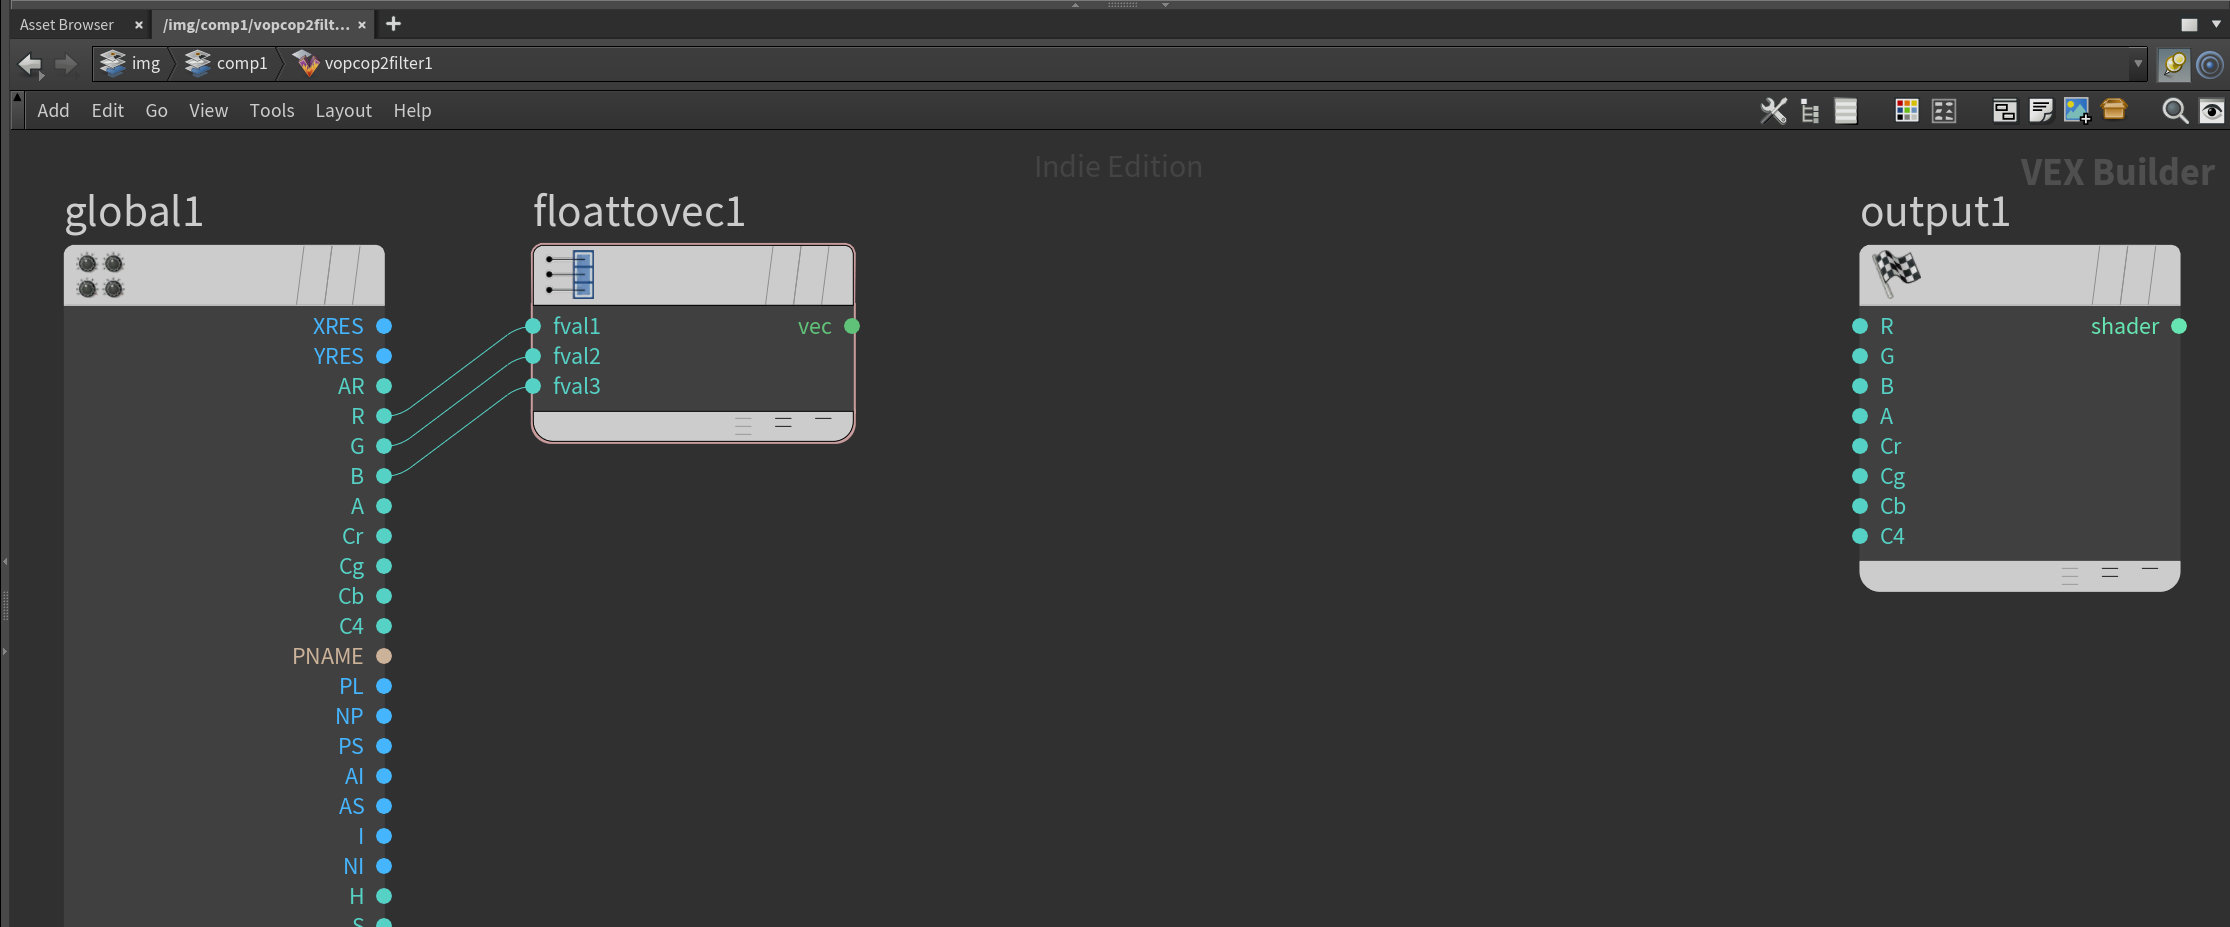
If you have ACES, let’s then move forward and open up a new image comp inside of Houdini. And once inside, let’s drop a ‘File‘ node and open up your image texture. Next we will drop a ‘VOP COP2 Filter‘ and drop it after the file node. Double click the VOP COP and then let’s dig in to create our own OCIO ACES color transform network.
Actually creating this filter is pretty easy mainly because Houdini has a built in OCIO color transform. So, let’s first drop down a ‘Float To Vector‘ converter so we can turn our RGB color values to a vector.
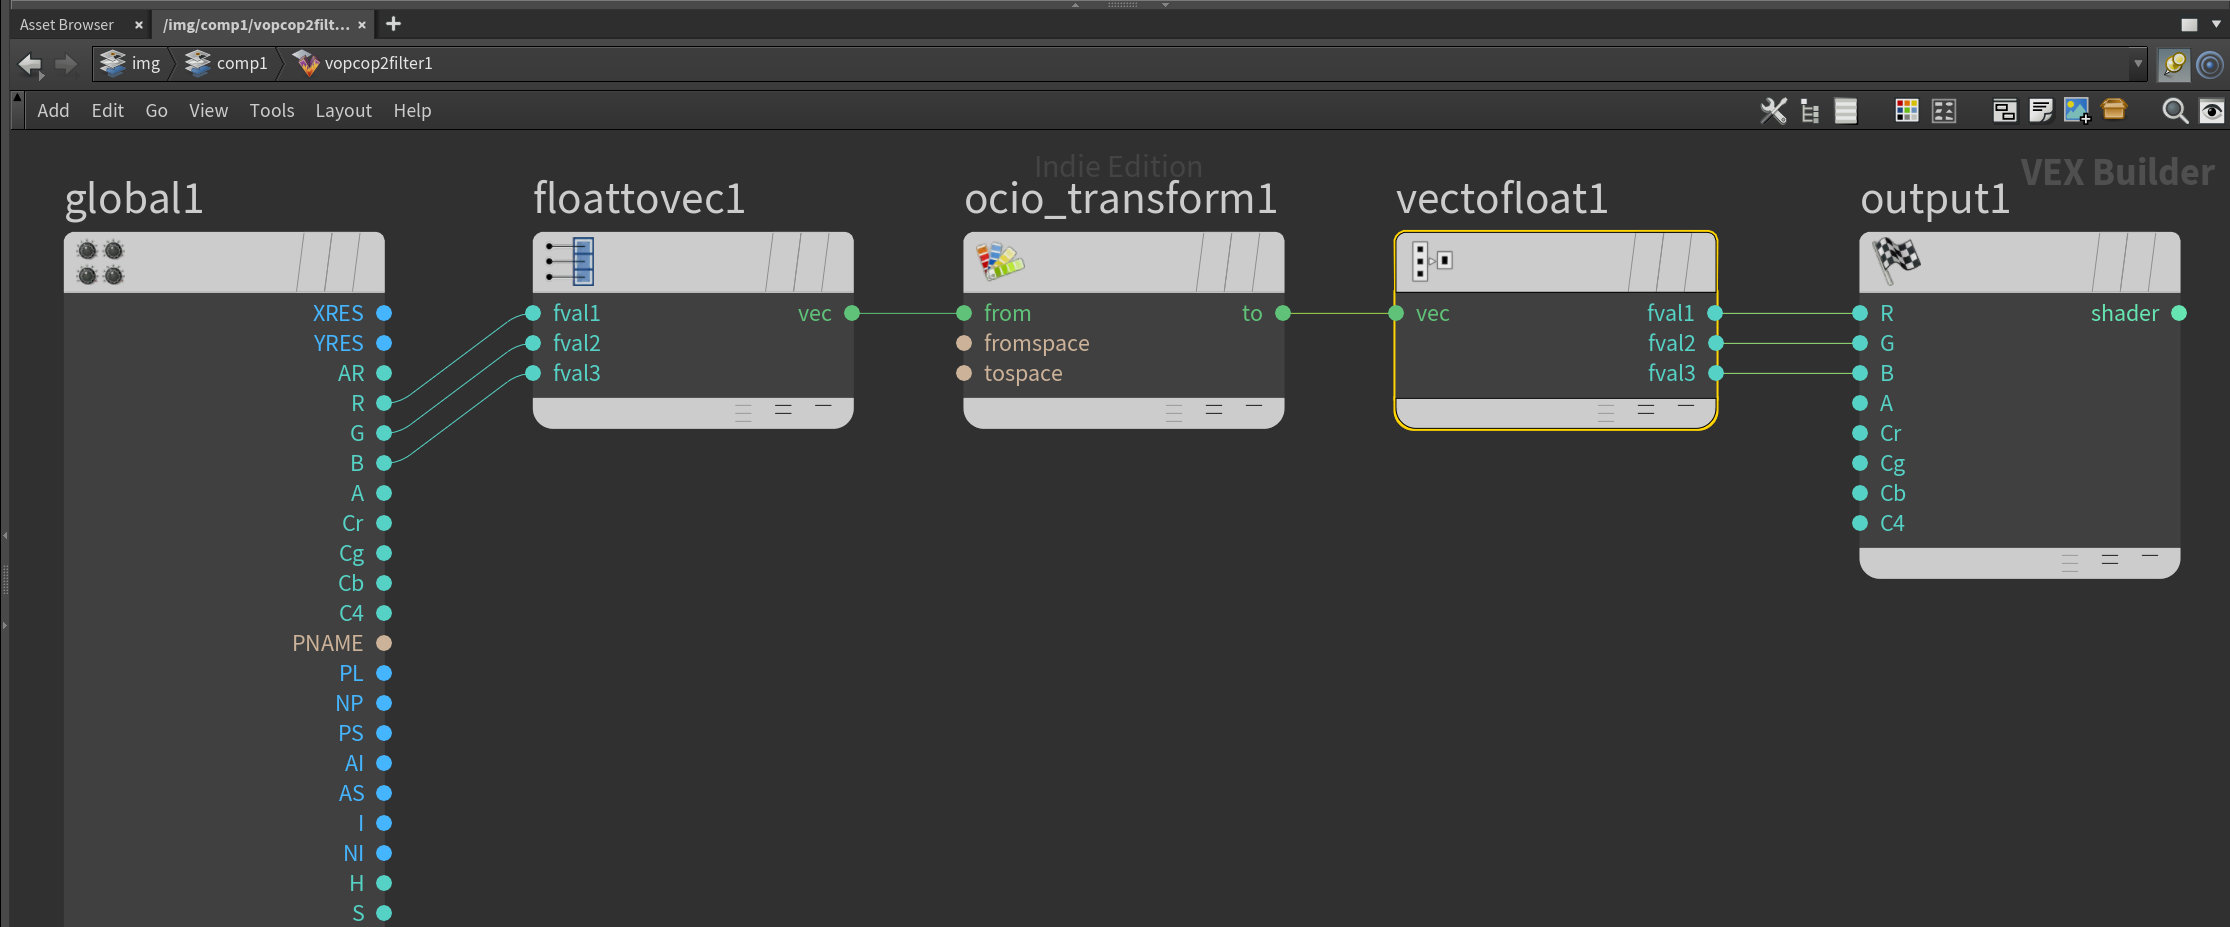
With our RGB values merged, let’s add a new node called the ‘OCIO Transform‘. We can then take our vector RGB output and plug it into the OCIO Transform. And while we are here, let’s adjust the color transforms. We need to set the ‘From Space‘ to match the original color space of the image. In most cases it will be ‘sRGB – Texture‘. And then we need to set the ‘To Space‘ to be ‘ACEScg’.
Once we have our conversion declared, we can then split our RGB vector to floats with the ‘Vector To Float‘ node, and with our RGB values split, we can finally plug the R (fval1), G (fval2) and B (fval3) outputs to the corresponding R, G and B inputs to the ‘Output‘ node. And that is it! We have our conversion built.
Let’s go ahead and leave our ‘VOP COP2 Filter‘ node create a ‘ROP File Output‘ node and plug it in. Go ahead and change the ‘Valid Frame Range‘ to be ‘Render Current Frame‘, name your file and set your render location and click render. If you want some additional information about Houdini and ACES, you can check out some of their documentation (which is surprisingly pretty good) and for this specific tutorial, you can check out their ocio_transform node docs as well.
And there we go. You have officially converted your image textures to an ACES color format to further maintain consistency between your CG and footage.
Thank you! I was having problems with textures and Redshift when rendering in ACES color space, so this helped me alot!